Saturday, March 26, 2011

Blog Design

Away from blogland, I'm a graphic designer. But the one thing I can't do, is design for myself. Too many options, colors, shapes and ideas to settle on one design! So I need your input. I'm trying (attempting) to redesign this blog without building a template because I don't have the time to do so. 
Is it too boring? Too much? 
Leave me some comments with how YOU chose to design your blog!
Let me see your inspiration!
-------------
I'm looking for knock-off tutorials to feature on my Sunday Inspiration blogs!
Right now I'm looking for FELT and LEATHER knock offs. Have one? Email me with the link! Have another one your dying to share? Email me that one too!

You guys are going to LOVE what I have coming up this week! Well, at least I love it! ;)
Stay tuned! Tutorials coming up tomorrow AND Tuesday!

And welcome again, to new followers and all of the wonderful comments I have received! I read every single one, and check out your blog, so keep them coming! =)


Thursday, March 24, 2011

Revised Tutorial!

Sad news indeed. My sweet little Drop Spindle had a horrible accident! An unknown force [OK either a massive cat, or a small dog] decided to test the poor Spindle's soccer skills. Needless to say, it wasn't very good.
After a few glue tests [hot glue vs gorilla glue vs carpenter glue] and suggestions from Craft sites, I figured out not only how to fix it, but to make it less fragile as well!
[No really. I did a 'drop' test. 3 times. On hardwood. It passed!!!]

Make sure you check out my brand new tutorial on making a Drop Spindle AND Newspaper Yarn! [If you can imagine it, it's even EASIER and FASTER than the previous one]!
I have another tutorial in the works for you, and I can't wait to share it! So stay tuned, and welcome all my new followers! Remember, if you have a "knock-off" tutorial you'd like featured on Sunday Inspiration, email me

Tuesday, March 22, 2011

Drop Spindle and Newspaper Yarn Tutorial! (edited!)

This week I was inspired to try my hand at newspaper yarn. The only problem was I didn't have a drop spindle. And since I don't see myself using one for another project anytime I soon I couldn't justify the price! ($95?!)
As you probably have noticed, I like to destash items. So I ransacked the house and found some items.
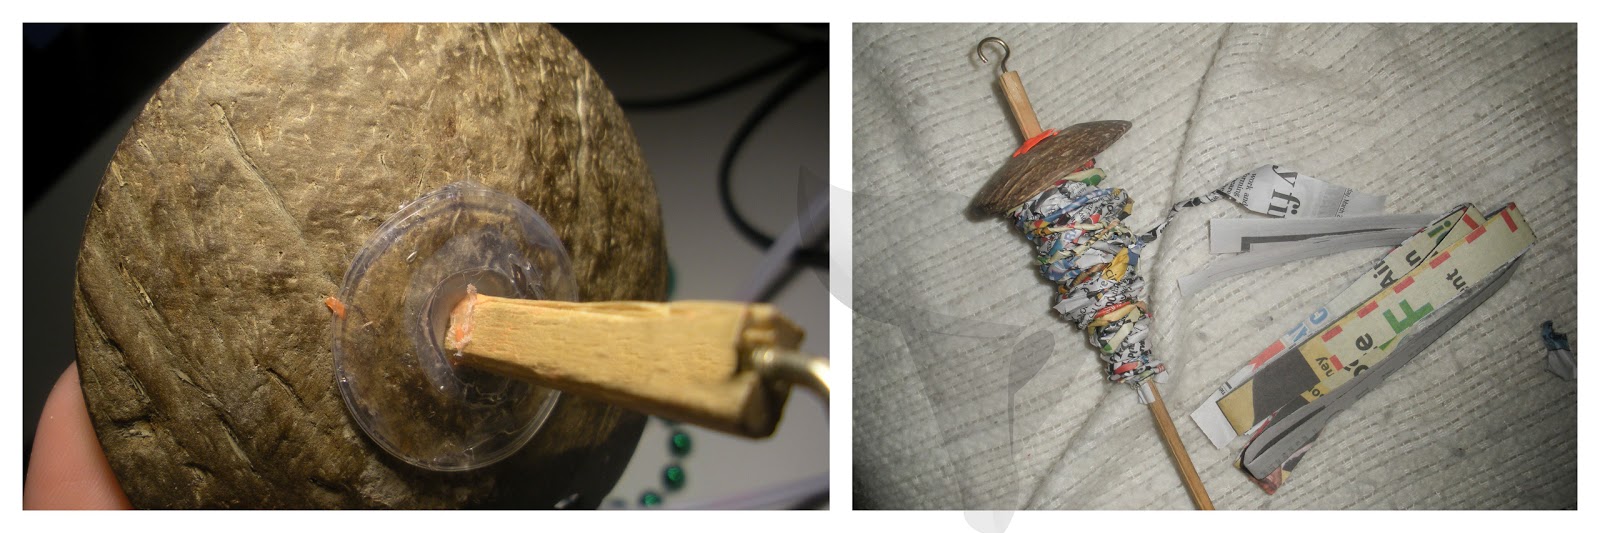
A dowel rod 1/8"thick, a closed picture hook and a piece of coconut. (Ahem, I have a Macaw and this may or may not have been stolen from a toy...) BE CREATIVE! There's no need to go buy fancy materials. Once you add up the cost of those, you might as well buy a Drop Spindle! As you can see the hole already drilled into the coconut was too big for the dowel. [EDITED!]
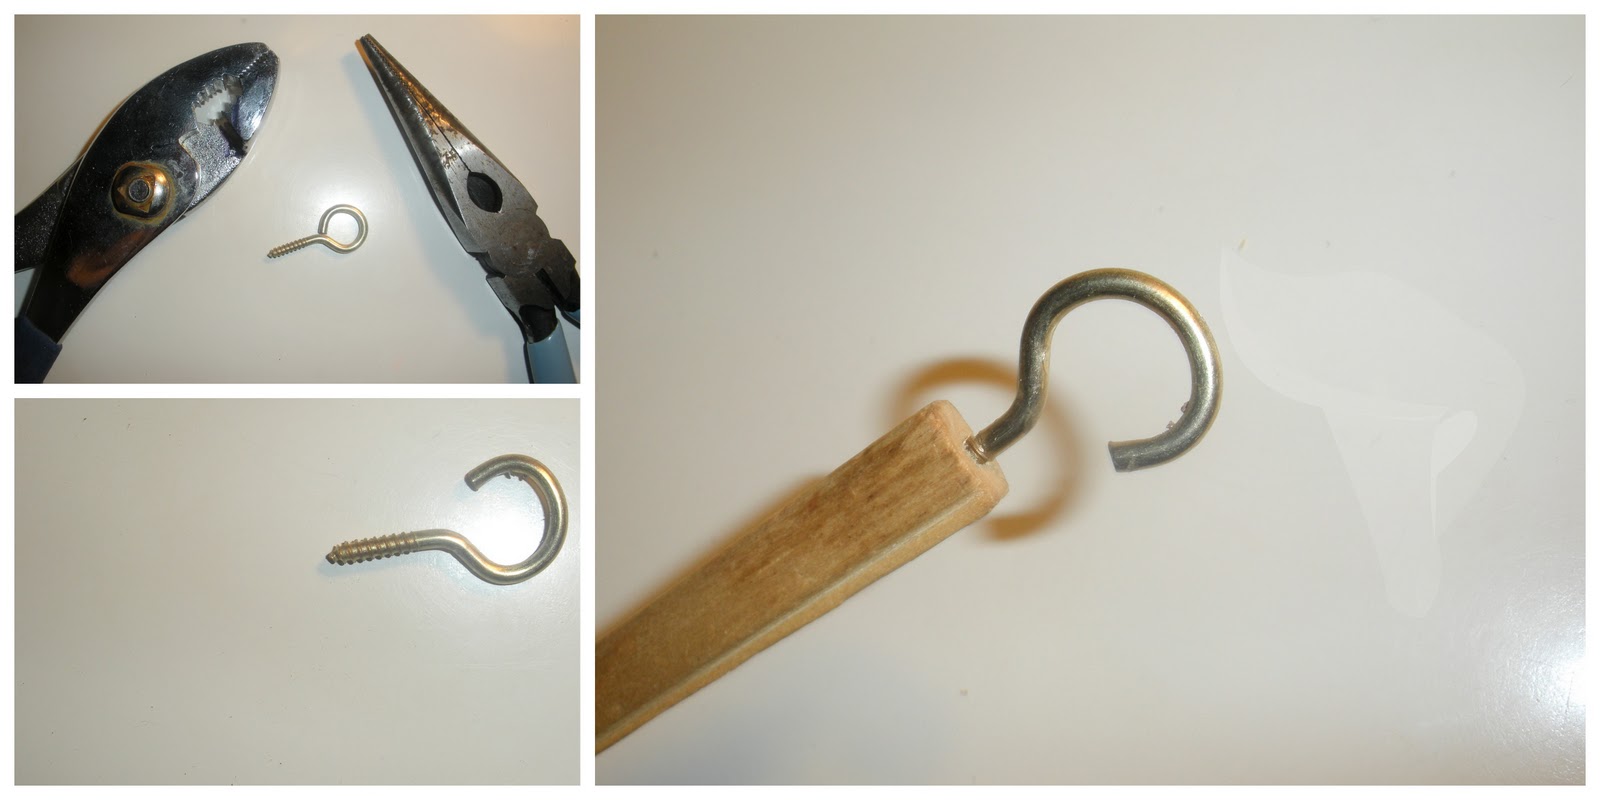
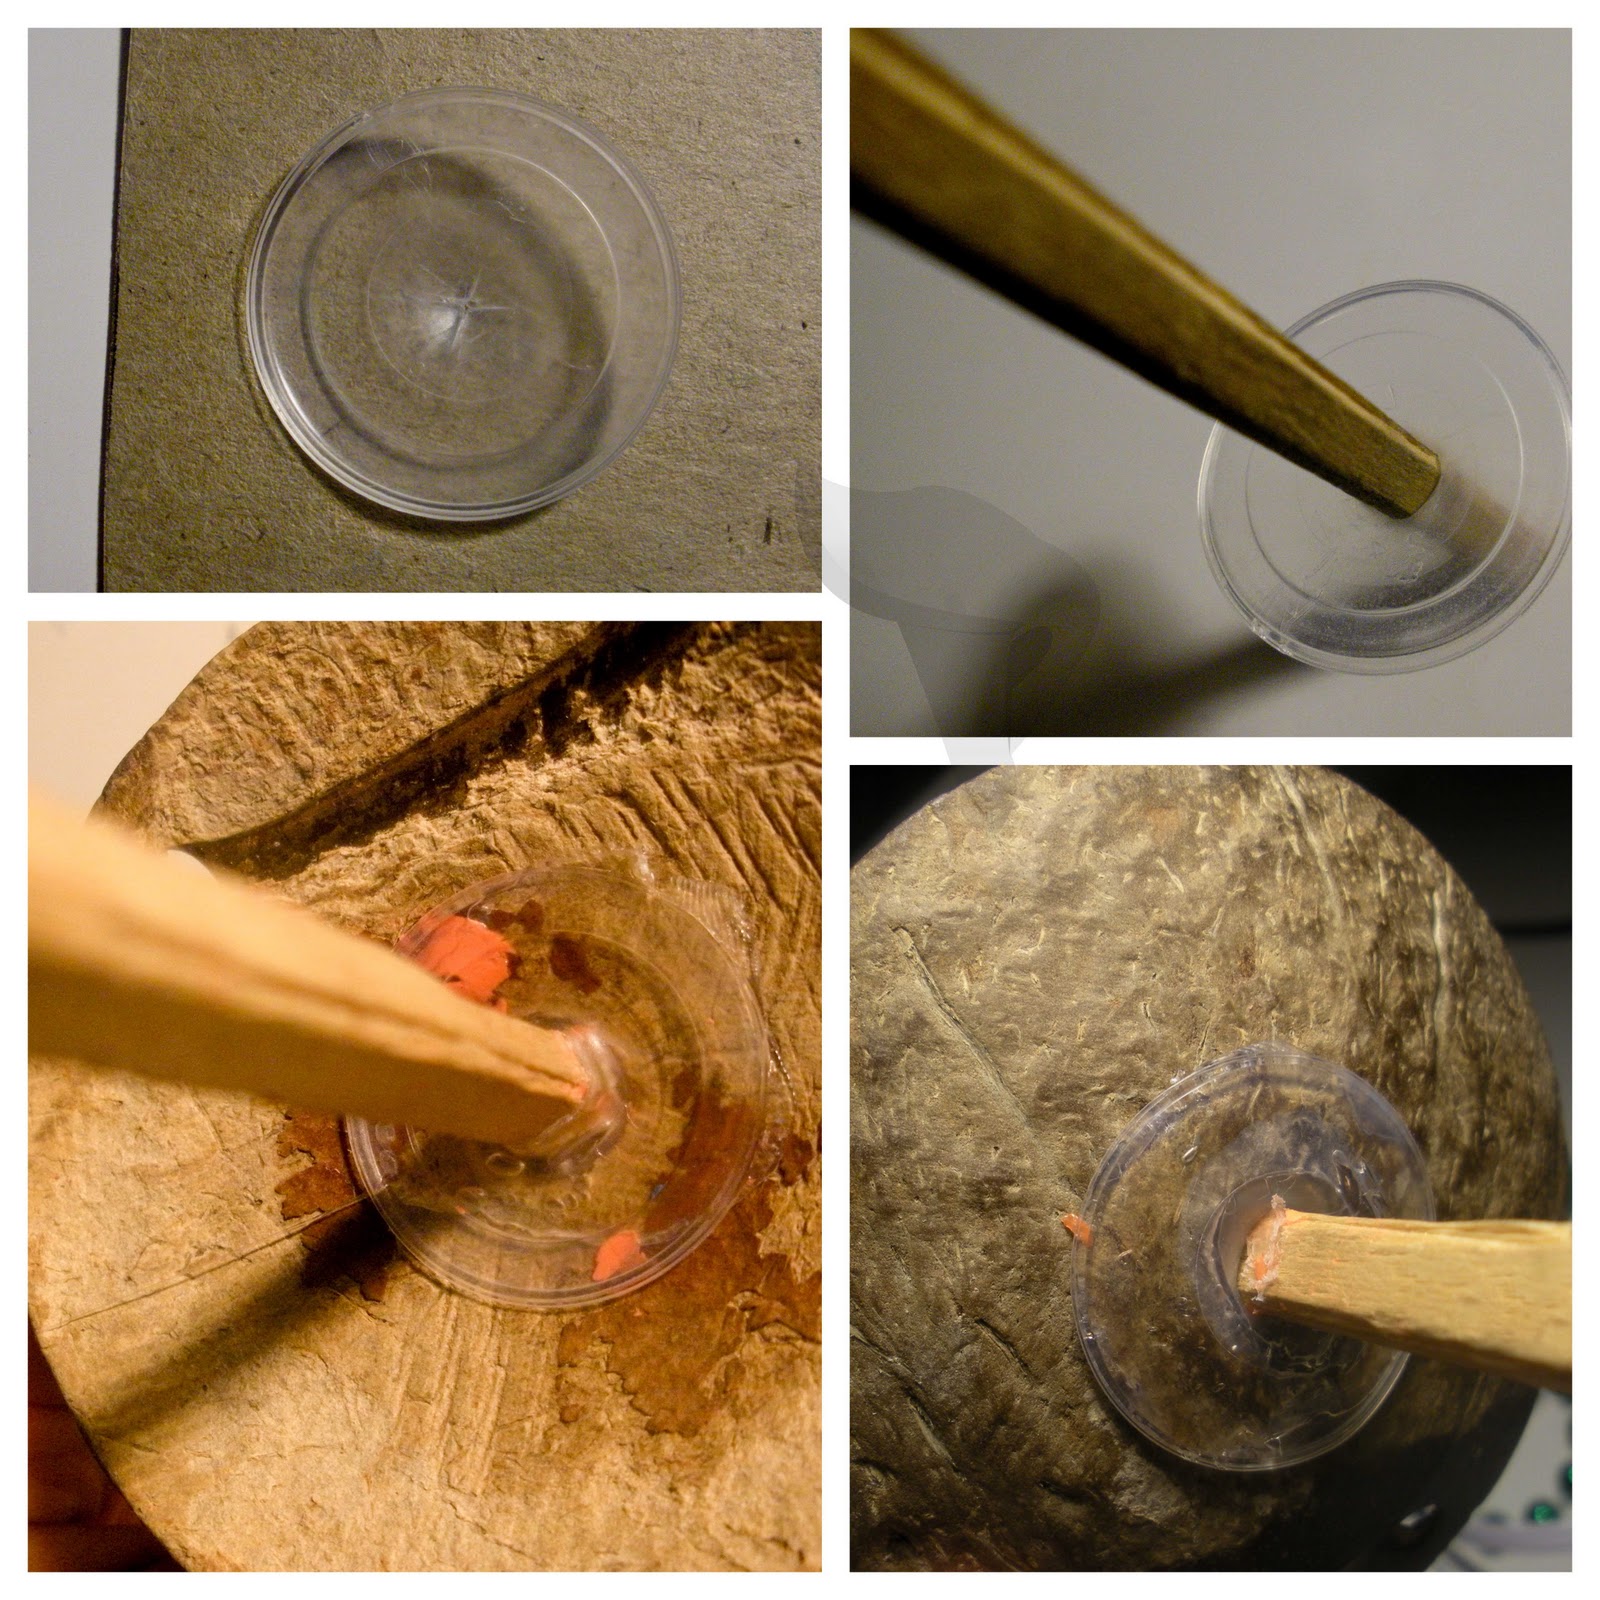
So I did the next best thing. I took two of those plastic disks inside of soda bottles. Pry the closed picture hook open. I used a couple pairs of pliers and then simply screw the hook into the end of the dowel. Here's where things started changing. I found that a chopstick fit the hole better AND the size of the hook, so I switched my dowel for a chopstick!


After you've attached the hook, take your plastic disks, and cut tiny 'X' holes in center of them. Take the first one and poke the end of the chopstick into it. Slide it up until its placed where you want the [coconut] to be. Hot glue all over the disk, and press the coconut into it. Once dry, slide the second disk up, and glue into place.
Now you're ready to begin using it! First find some newspaper. Fold it in half going the longest way, and fold it over again. (so it makes a fourth!). Cut that into strips .5"-1" thick. So you have a giant pile of strips!
Take one strip and begin twisting it, when you have enough twisted, tie the end to the spindle. Continue twisting until it's long enough to wrap around the hook. Now your ready! Simply 'spin' the spindle against your leg while holding the OTHER end of the newspaper in your hand, and 'drop' the spindle. It will twist the paper when you let go!
For an AMAZING tutorial on it check out Lark Crafts!


Total cost (for me) $0 [had everything on hand!]
Have a question? Let me know! I'd be happy to answer it!

Sunday, March 20, 2011

Sunday Inspiration!

Sitting at home, bored and uninspired? How about recreating some of the beautiful [ahem. EXPENSIVE.] things you've been drooling over!

Every Sunday I will compile a list of tutorials based on inspiration pieces from popular stores! Maybe you've seen some of them, maybe not. Have a great inspiration tutorial you want to share? Email it to me to be featured!

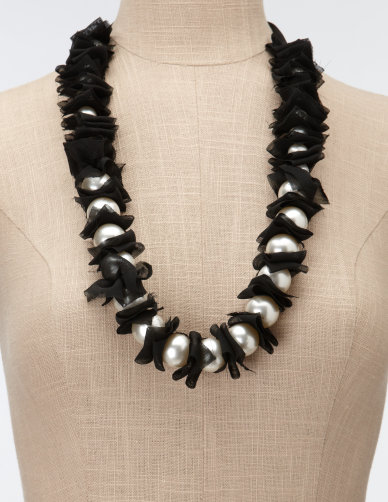
First we have this beautiful; Ribbon and Pearl Necklace. 
 (Picture from Charlotte Russe)
There's one at Barneys for $790
Or a homemade version for FREE at Oh So Crafty


Next is this amazing; Accordian Strand Necklace
(Picture from Shopstyle)
Or a homemade version for less than $5 (depending on your material stash!)


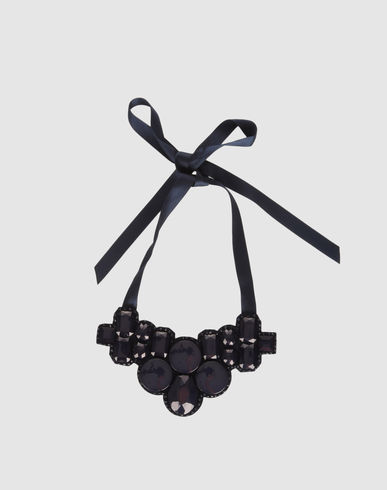
And last but not least; the infamous Rhinestone and Satin Bib Necklace
(Picture from Yoox)
Or make your own version at Love Stitched!


Congrats to my first ever Sunday Inspiration Features! If you've been featured, grab a button!

Featured? Grab a button!

Friday, March 18, 2011

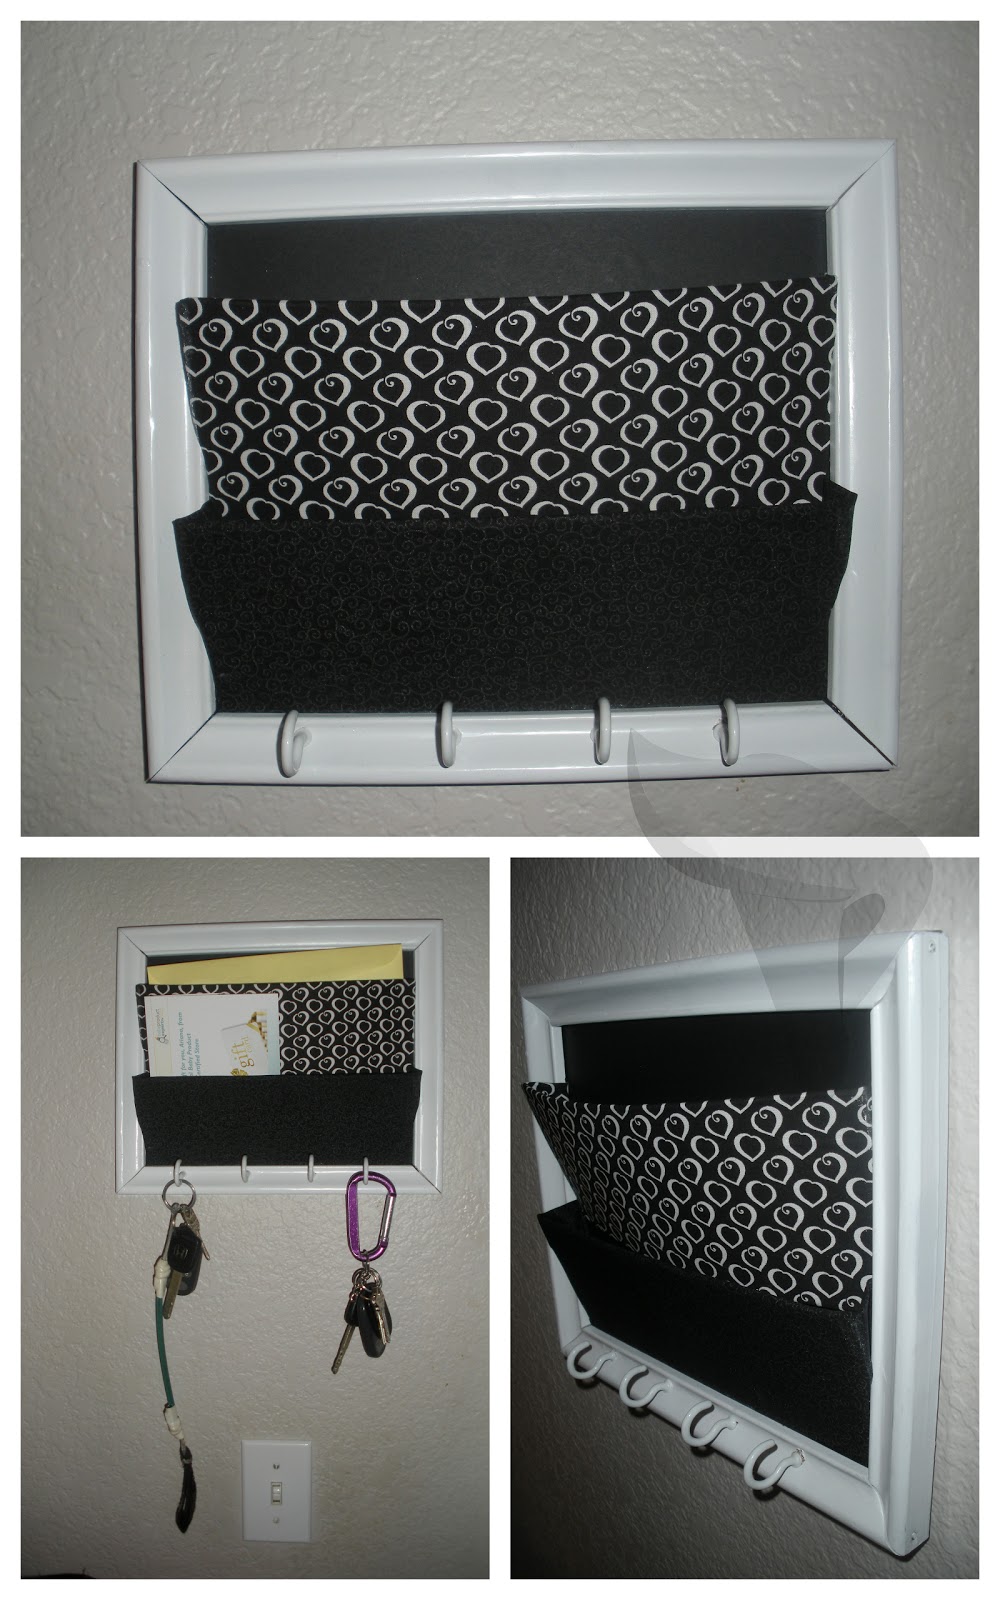
Mail Organizer Tutorial!

This week has been soooo messed up! I couldn't post this on Tuesday because we had no power, and then I was out of town for the next few days! So a little late, but here is the Mail Organizer tutorial!

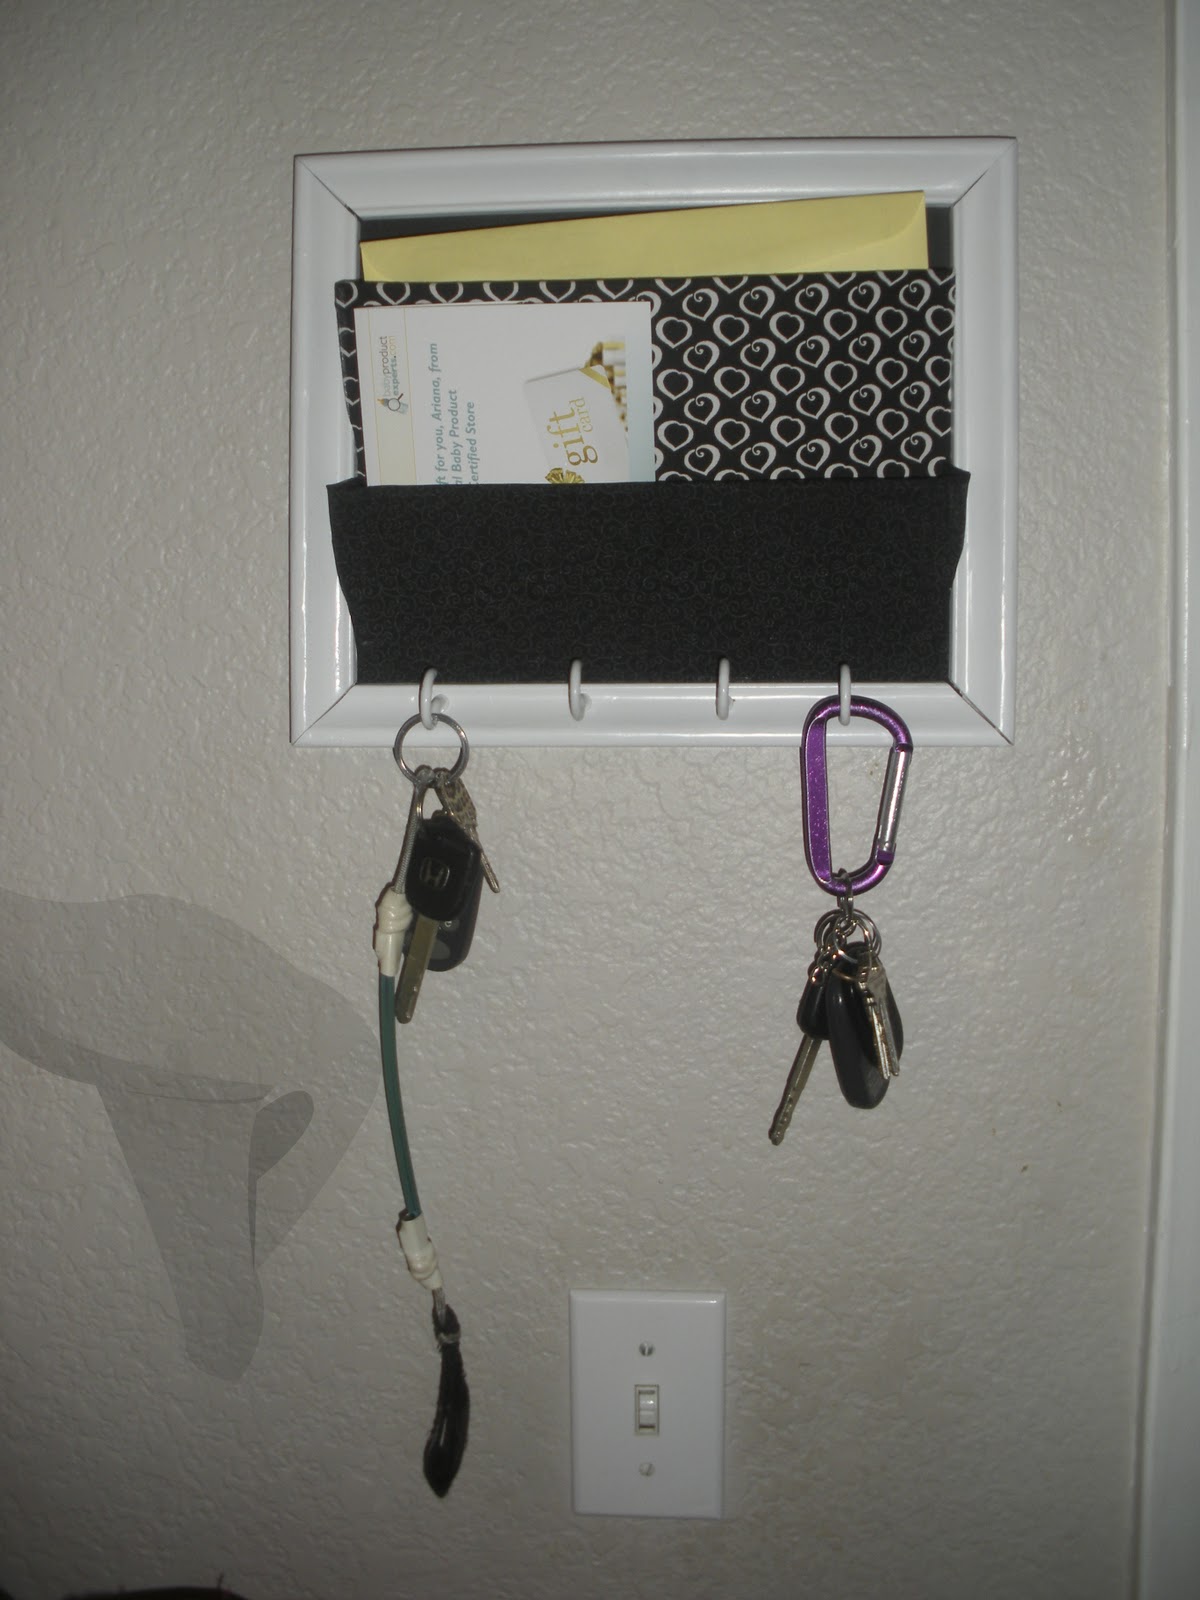
I'm sure I'm not the only one with piles of mail sitting in various positions throughout the [house]. I needed to be [semi] organized. Important mail HERE. Other mail HERE. Simple right? Well desk filing systems were out of the question, I don't have 3 inches of flat space ANYWHERE. The only way I could go, was up.

I spent a half a day surfing for inspiration. And the rest of it scrounging through boxes looking for something I could use. And thus I found this:

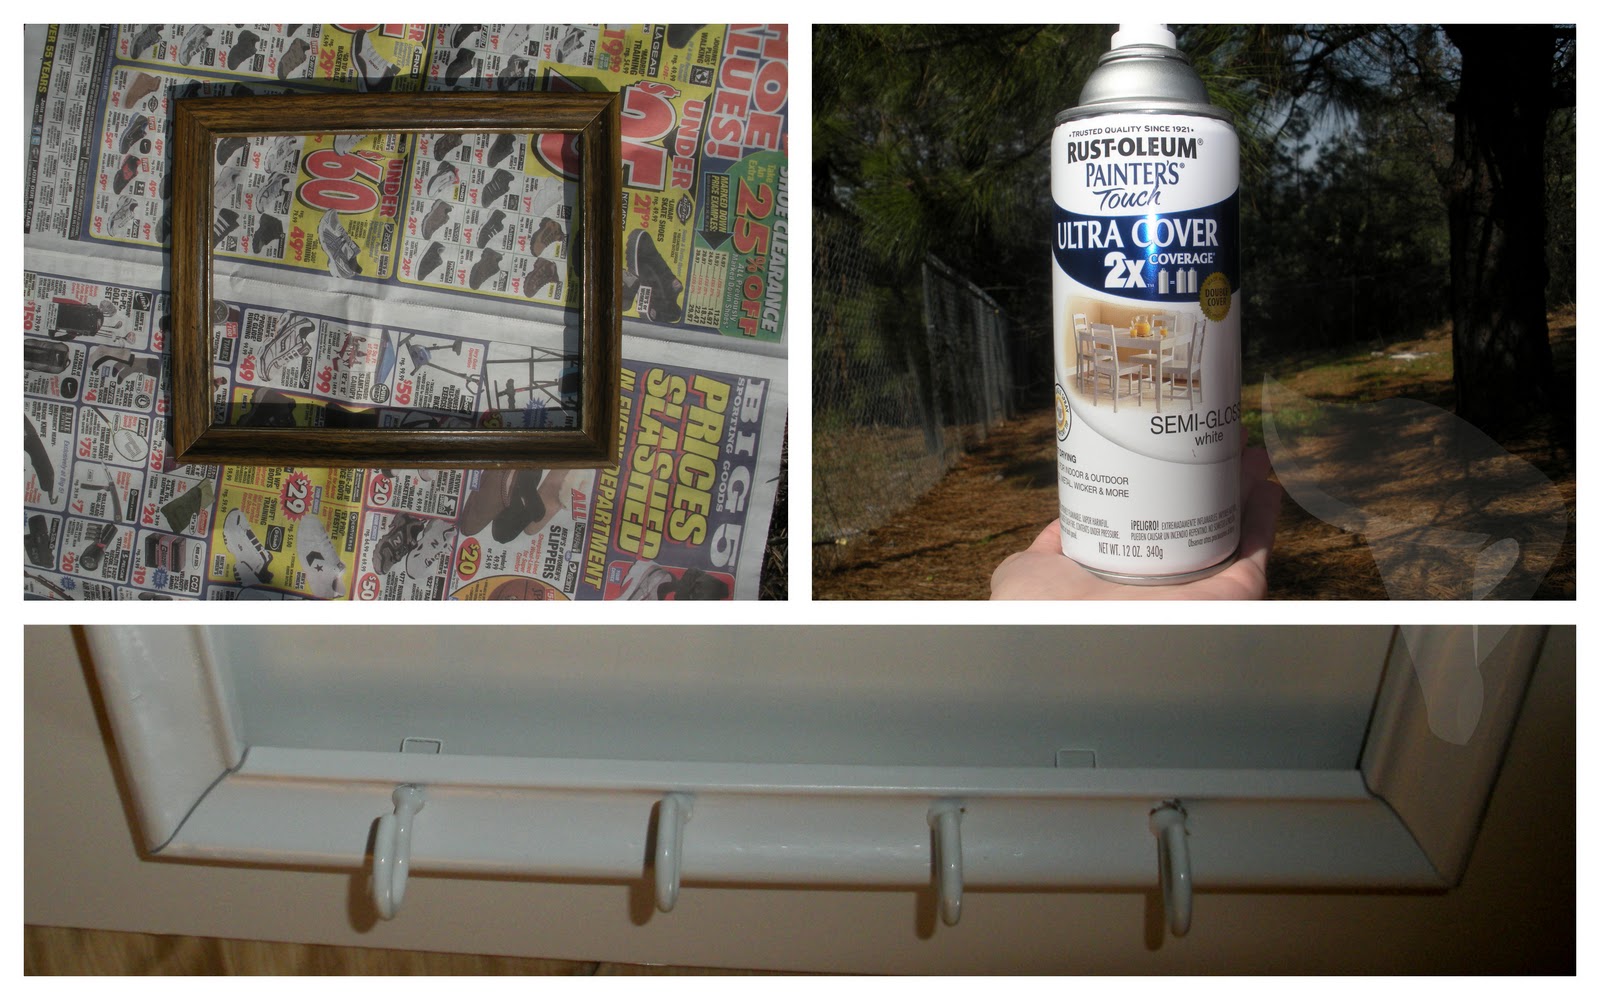
[AKA UGLY old frame, note its falling apart and lacking glass]
The first step is to lightly sand it, it has some weird varnish on it (not to mention its the fake wood laminate stuff) and you want it to soak in the paint. Then using new nails and wood glue, I put the frame back together. Then I took off the existing hook (since it was hung for a vertical picture) and reattached it to the side (because I wanted it to hang horizontal).
Paint (I chose white to match the room it was going in) + Frame + Hooks=Awesome. (The frame will need multiple coats and lots of drying time in between)

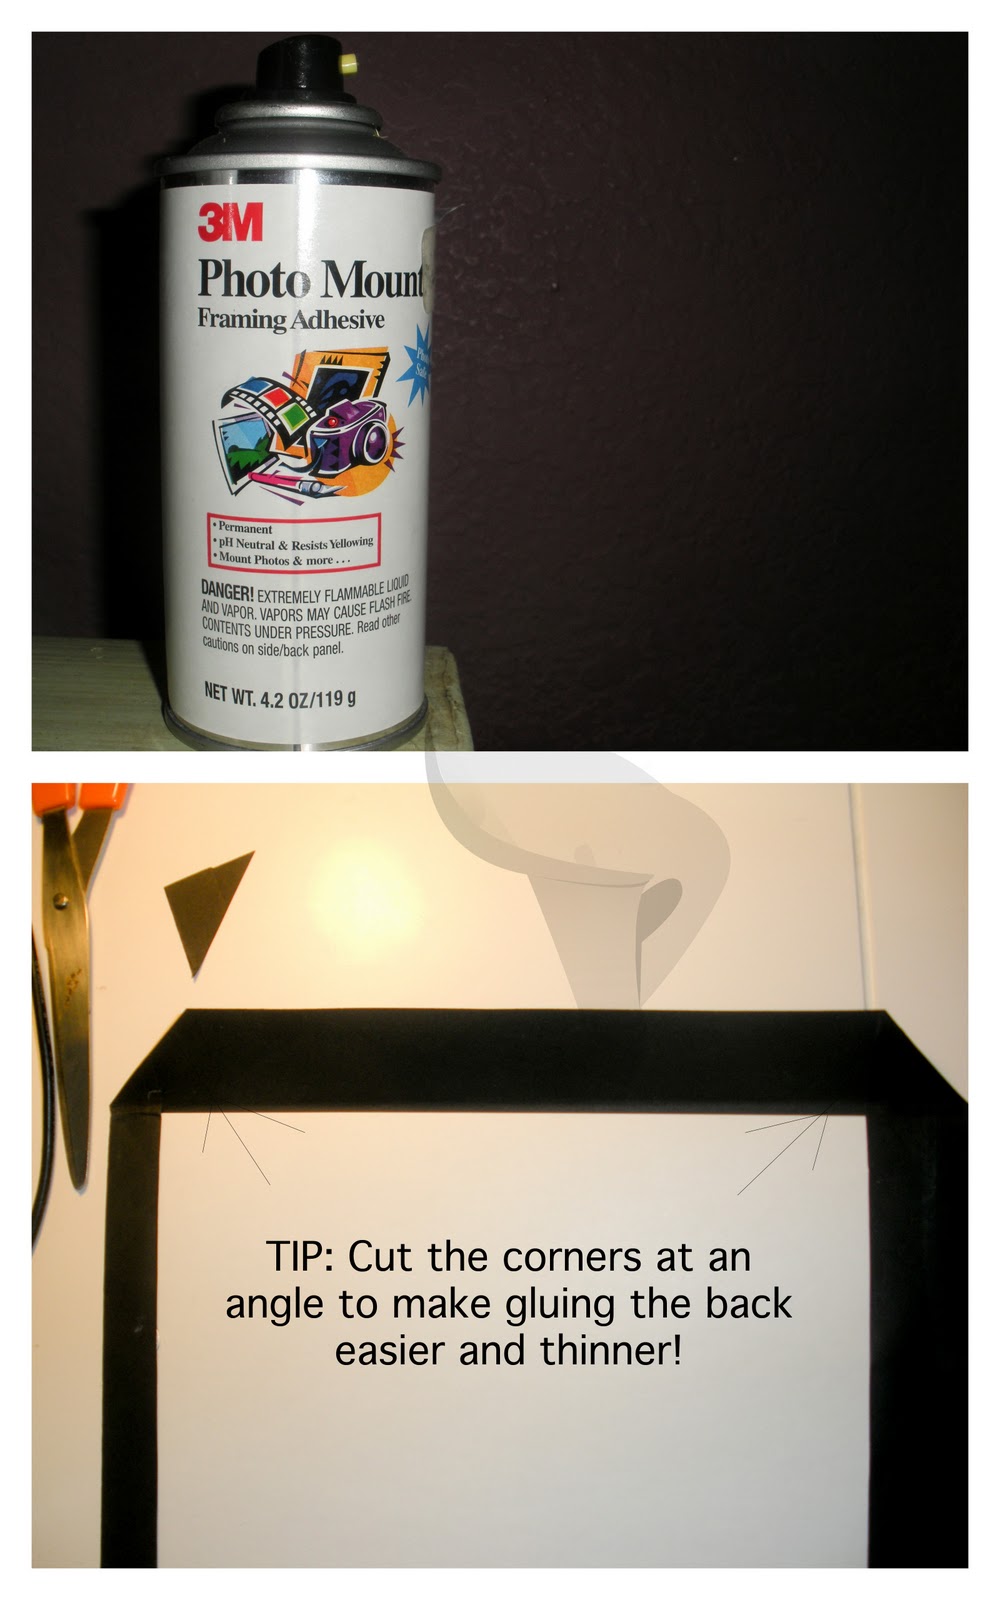
While that's drying, lets start on the inside. First measure the opening of the frame and cut a piece of cardboard or mat board**slightly** smaller. I used spray photomount to cover it with a piece of scrapbook paper. You could also use fabric instead!

Using the rest of the cardboard/mat board, I cut it down to make two pieces of identical size (specifically 3.5"x9", but it depends on your frame) You can eyeball it to see what sizes would look best in your frame. I spray mounted these cardboard pieces onto some left over scraps from quarters. (Cover both sizes, leaving about an inch on the bottom of leftover fabric, and on the sides. 

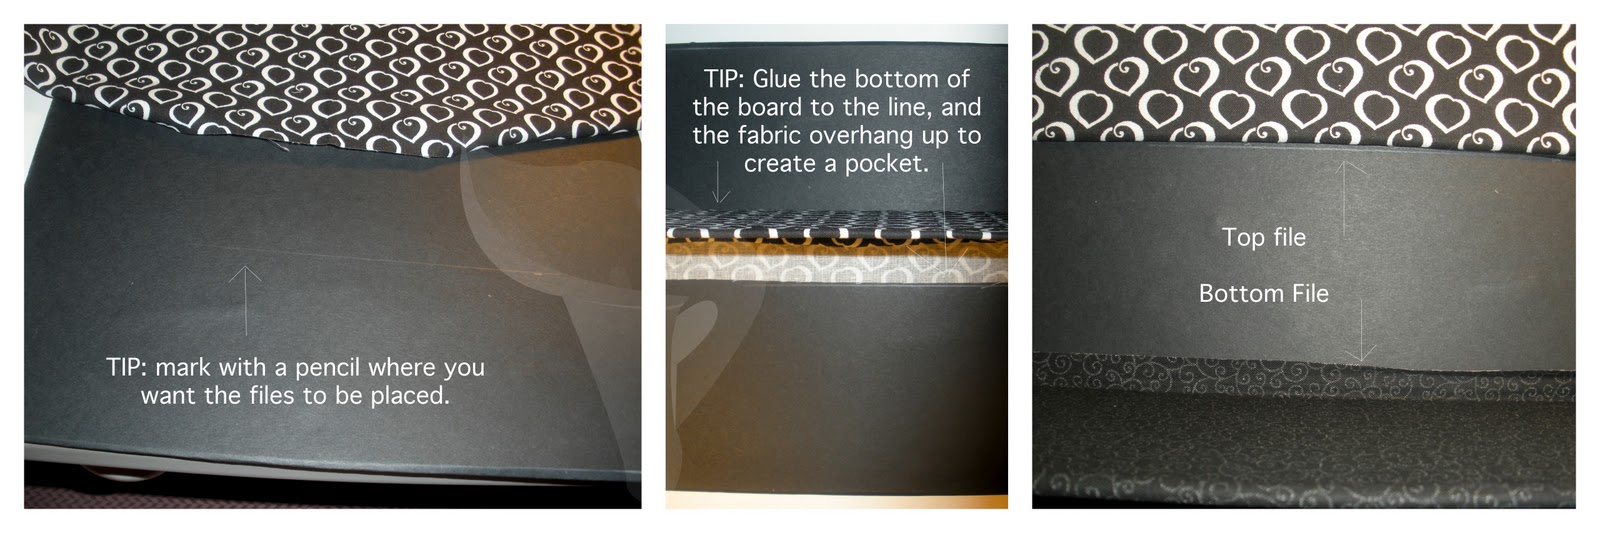
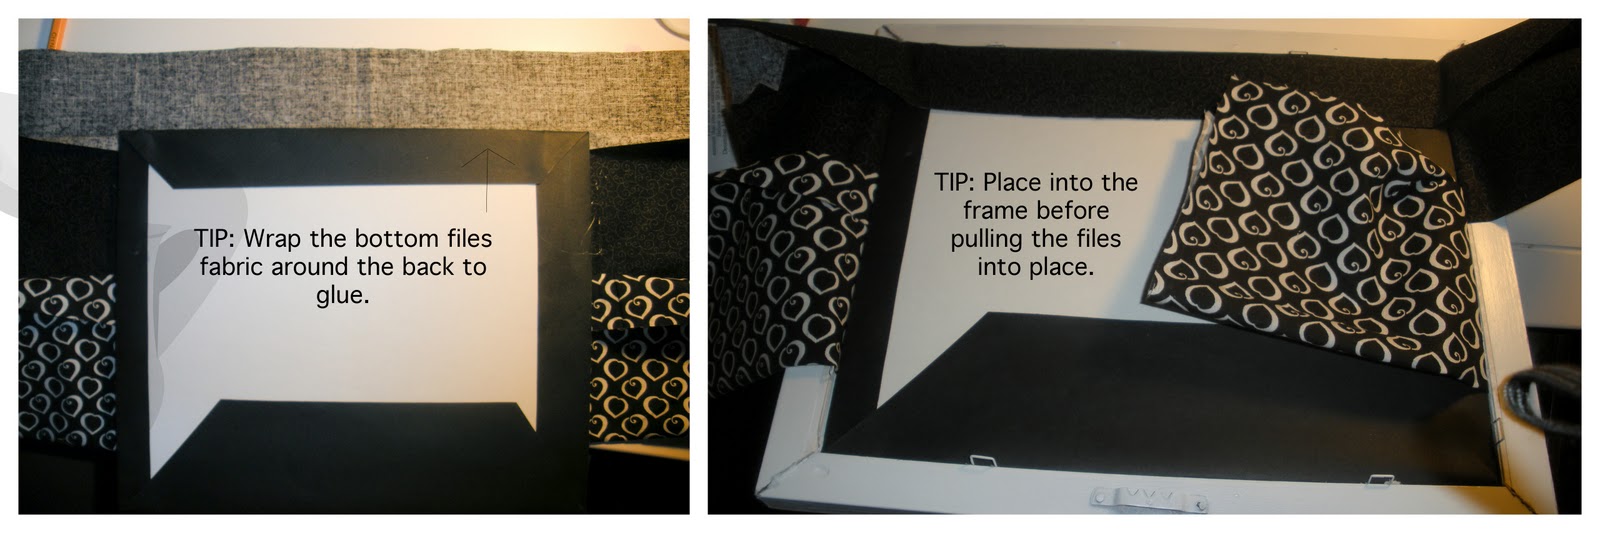
When the pieces are dry you can start assembling. First measure out on the mat board, where you want the files to go. Since my pieces were 3.5" high, I set the top one at about 3" from the bottom so it would be slightly inside the pocket. Using hot glue, I attached the 1" of left over fabric to the board above the line (so the bottom of the piece was laying on the line). The bottom piece will attach on the very bottom of the bigger board, with the 1" of fabric glued all the way around to the back. (See pictures).

Once the pieces are assembled, (and dry!) place it inside of your frame. Carefully pull the files out of the frame until they are where you want them. Cut the fabric down in the back, and glue into place. Close the back of your frame up and attach to the wall!

Now comes the fun part. Decorating! I haven't decided what I want to do with mine yet, but you could attach ribbon, or frames or buttons to label which section is for which.

Total cost (for me) $0 [had everything on hand!]
Have a question? Let me know! I'd be happy to answer it!


Sunday, March 13, 2011

Weekly Domestication Lesson

Great news! Have 2 tutorials finished, and 3 more half done. ;) 
But you lucky followers are going to have to wait until Tuesday for me to post one!!
Insert my Weekly Domestication Lesson! 
;)
In all fairness I do have some great things I want to share with you! Ever find a amazing item on your surfing adventures and think "I can make that...for a LOT less..." but can't find instructions ANYWHERE?!
Me too! And I can help. No men required [or heavy duty tools for that matter].
This is modern age domestication. 
Enjoy!

Tuesday, March 8, 2011

Instant Gangsta, just add [Spray] paint!

I forgot I had these pictures, but I found them yesterday so I figured I would post a small tutorial while I'm **STILL** putting together a few others. 


I found this dress at the Goodwill for $8 (At Halloween, so everything was 50% off...make that $4)
MATERIALS:
A dress (gray ugly boring one)
Black spray paint (had it on hand)
Masking/painters tape [Thinner the size, the better]
Scissors
Accessories [To dress up the outfit!]
Oh and a wonderful boyfriend =)


Simply place the tape vertically down the dress. Perfection is impossible, so try not to worry about it. I only had thick tape on hand, so I used scissors (and my amazing patient boyfriend) to cut the tape down the middle to make two strips. Once it was all attached, take it outside and spray paint away!
I let it dry for an hour or two before removing the tape. 
Then left it a day before washing in HOT water (to set the paint). After it dried I washed it again using dishsoap to make it less crinkly (and smell good!)
I accessorized the dress using a black high waist belt, stockings and fedora. 
Instant Gangsta just add spray paint!
Total cost (for me) $4 [For the dress!]
Have a question? Let me know! I'd be happy to answer it!