This week has been soooo messed up! I couldn't post this on Tuesday because we had no power, and then I was out of town for the next few days! So a little late, but here is the Mail Organizer tutorial!
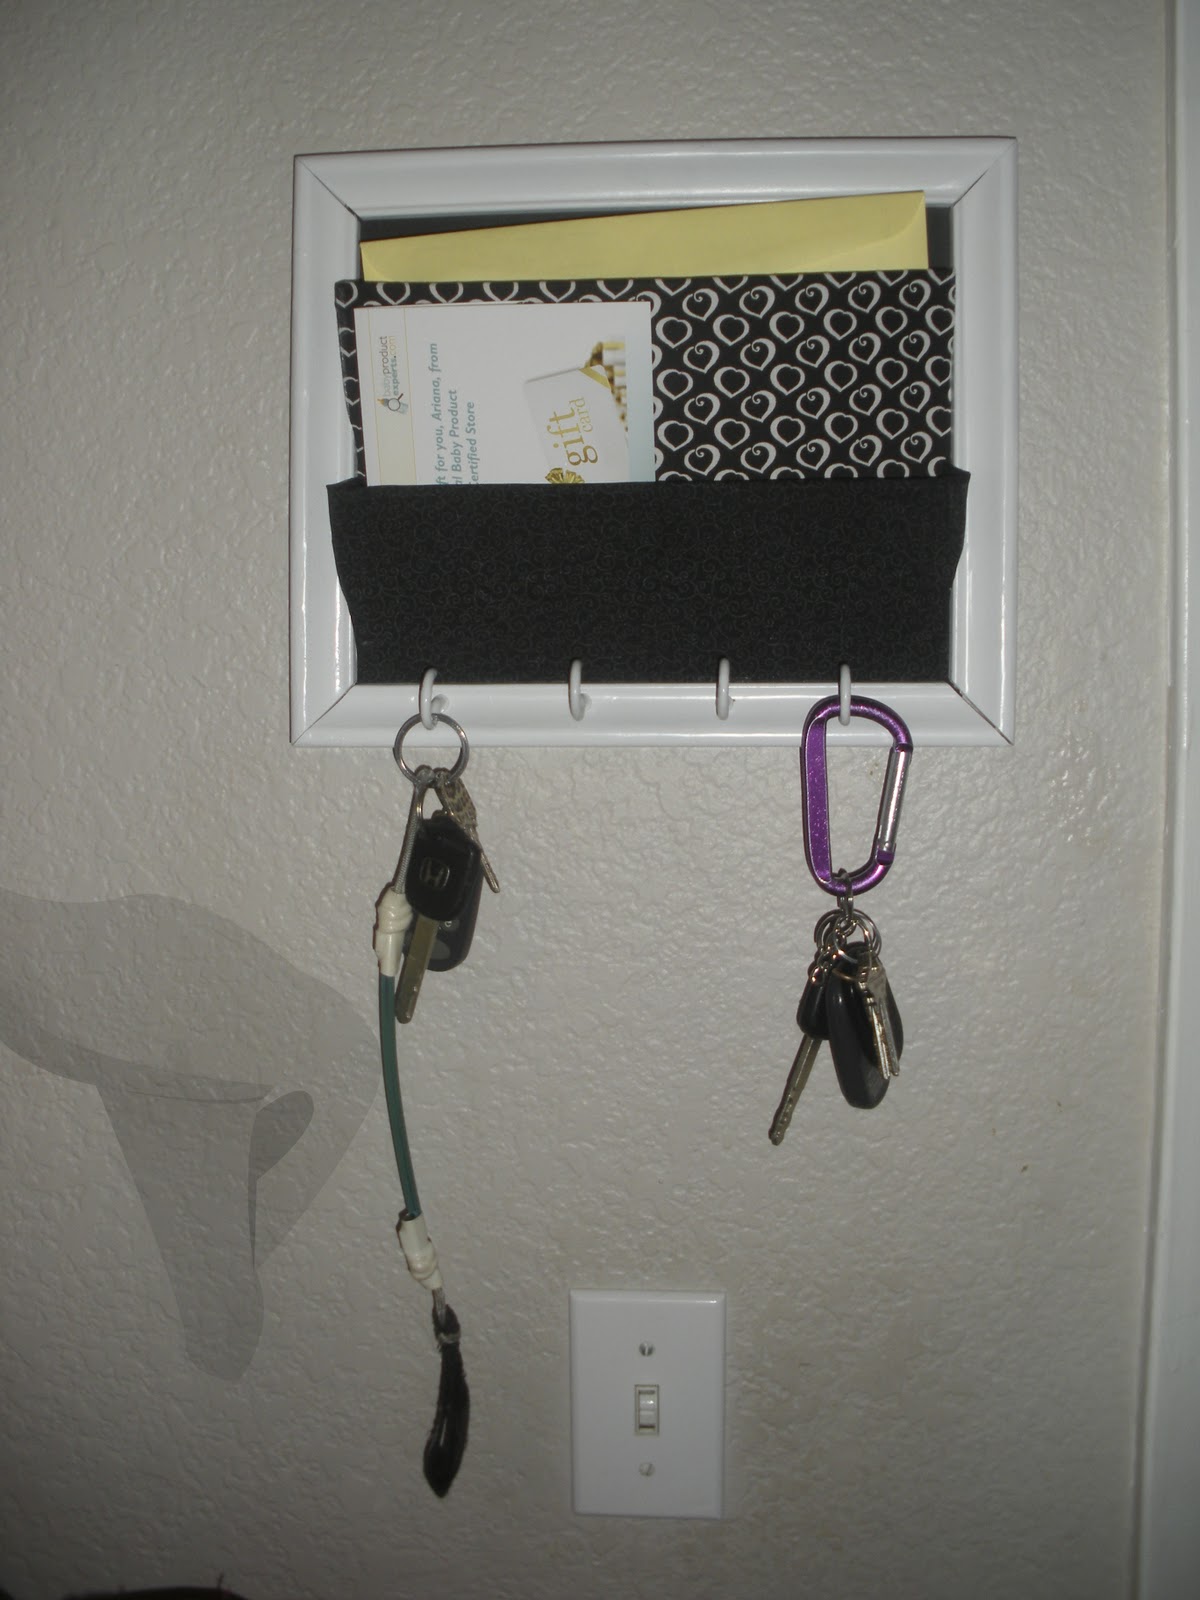
I'm sure I'm not the only one with piles of mail sitting in various positions throughout the [house]. I needed to be [semi] organized. Important mail HERE. Other mail HERE. Simple right? Well desk filing systems were out of the question, I don't have 3 inches of flat space ANYWHERE. The only way I could go, was up.
I spent a half a day surfing for inspiration. And the rest of it scrounging through boxes looking for something I could use. And thus I found this:

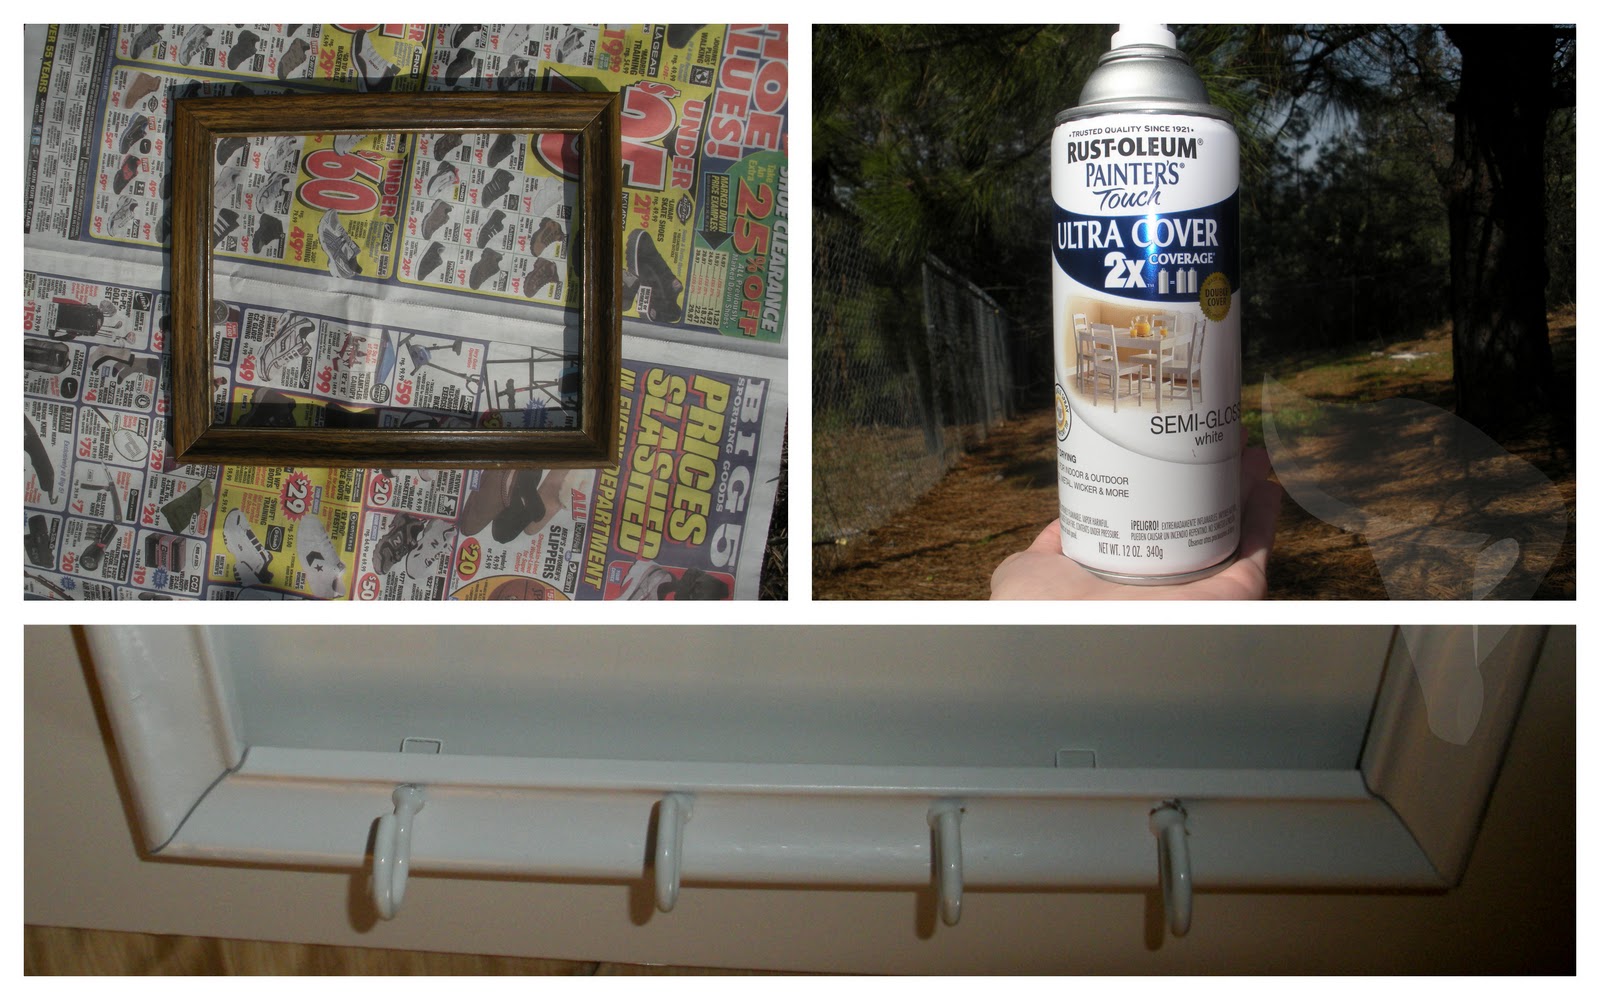
[AKA UGLY old frame, note its falling apart and lacking glass]
The first step is to lightly sand it, it has some weird varnish on it (not to mention its the fake wood laminate stuff) and you want it to soak in the paint. Then using new nails and wood glue, I put the frame back together. Then I took off the existing hook (since it was hung for a vertical picture) and reattached it to the side (because I wanted it to hang horizontal).
Paint (I chose white to match the room it was going in) + Frame + Hooks=Awesome. (The frame will need multiple coats and lots of drying time in between)
While that's drying, lets start on the inside. First measure the opening of the frame and cut a piece of cardboard or mat board**slightly** smaller. I used spray photomount to cover it with a piece of scrapbook paper. You could also use fabric instead!
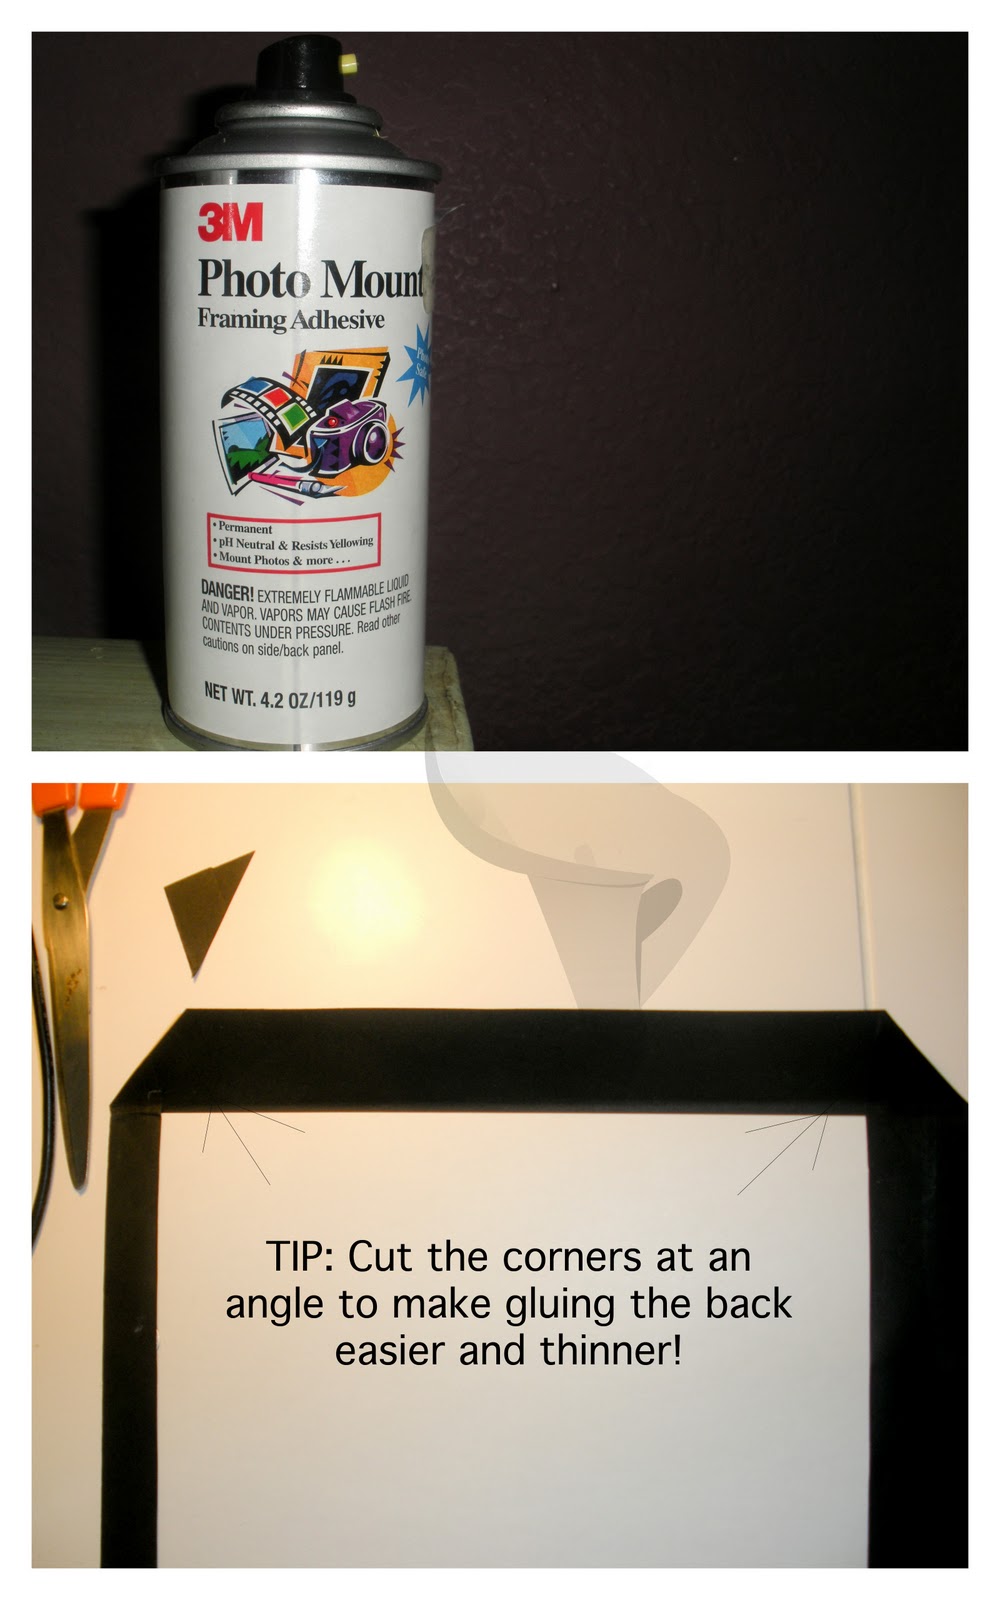
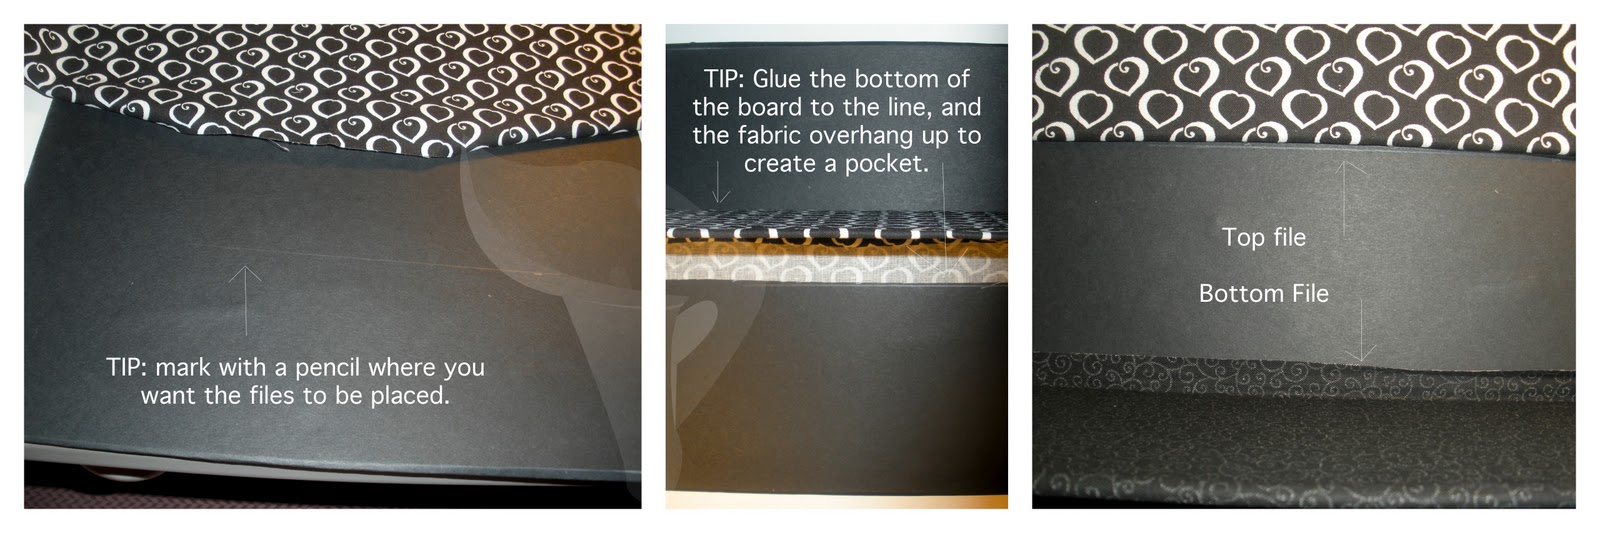
Using the rest of the cardboard/mat board, I cut it down to make two pieces of identical size (specifically 3.5"x9", but it depends on your frame) You can eyeball it to see what sizes would look best in your frame. I spray mounted these cardboard pieces onto some left over scraps from quarters. (Cover both sizes, leaving about an inch on the bottom of leftover fabric, and on the sides.

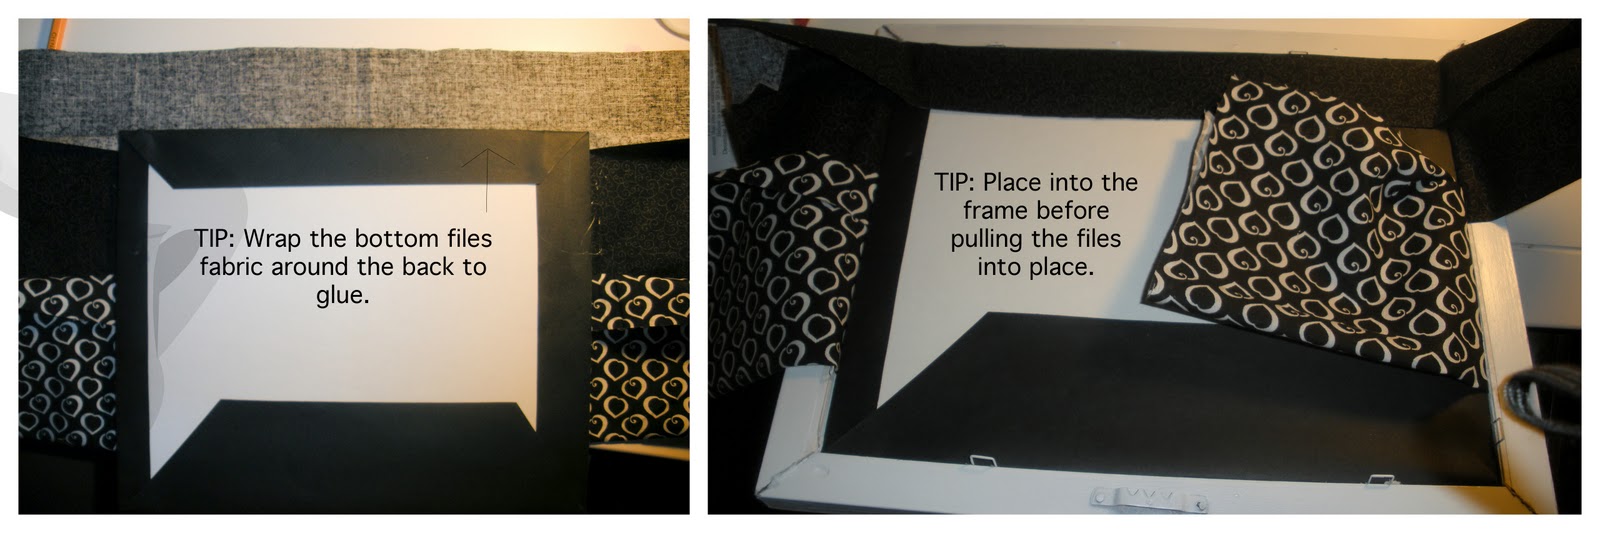
When the pieces are dry you can start assembling. First measure out on the mat board, where you want the files to go. Since my pieces were 3.5" high, I set the top one at about 3" from the bottom so it would be slightly inside the pocket. Using hot glue, I attached the 1" of left over fabric to the board above the line (so the bottom of the piece was laying on the line). The bottom piece will attach on the very bottom of the bigger board, with the 1" of fabric glued all the way around to the back. (See pictures).
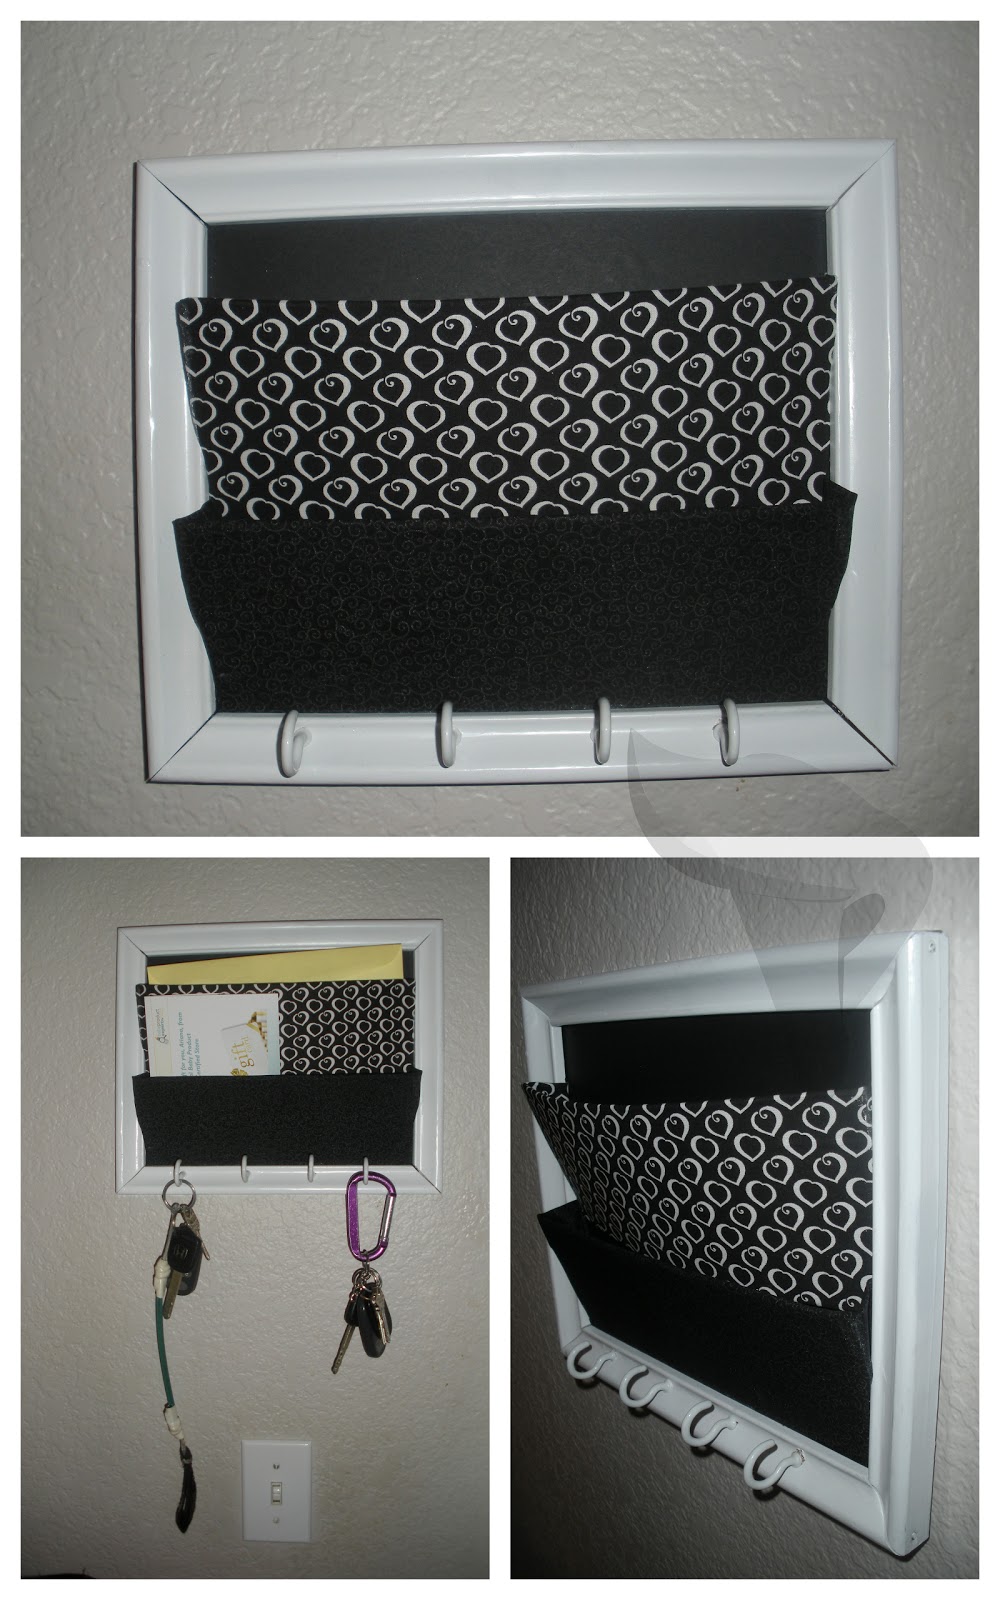
Once the pieces are assembled, (and dry!) place it inside of your frame. Carefully pull the files out of the frame until they are where you want them. Cut the fabric down in the back, and glue into place. Close the back of your frame up and attach to the wall!
Now comes the fun part. Decorating! I haven't decided what I want to do with mine yet, but you could attach ribbon, or frames or buttons to label which section is for which.
Total cost (for me) $0 [had everything on hand!]
Have a question? Let me know! I'd be happy to answer it!


This project has been featured at:
Very cute! Thanks for the tutorial so I can put it on my to-do list! :)
ReplyDeleteDid someone say organizer? Yep I need this too.
ReplyDeleteHow smart are you!?!?? This is genius! I love it! esp the colors you chose -- and patterns! =)
ReplyDeletecan't wait to read more! <3
xoXOxo
Jenn @ Peas & Crayons
Very Cute!!! I will be featuring this tomorrow on my blog. Please feel free to grab a button!!! Great job!
ReplyDeleteAbbi
Great idea for using an old picture frame. I have so many of those lying around. Thanks.
ReplyDeleteThanks for linking up! You got featured! Feature Friday
ReplyDeleteThat is such a brilliant idea!I love it.
ReplyDeleteThanks for the tutorial. This would make for a great house warming gift for one of my friends.
ReplyDeleteI love this! What a great idea for an old picture frame. I will be putting this on my blog soon, I recently did something else with old frames so this will be perfect! Great idea!
ReplyDeleteLove your mail file! Functional, and pretty too. Thanks for sharing.
ReplyDeleteThis is way cute! and a great idea, thanks for sharing. onehotcrafty-mama.blogspot.com
ReplyDeleteOh! That turned out so cute!!! Love the fabric choice! BTW thanks for stopping by my blog and for your sweet comment! I would LOVE for you to feature my project!!!
ReplyDeleteJust so you know I just put this up on my blog, I love it!
ReplyDeleteWalMaster Systems utilize unused wall or panel space to create cleaner, more productive work areas. The sleek, heavy-duty anodized Aluminum Rails mount easily to walls or to standard slotted panel systems using the appropriate Mounting Brackets.
ReplyDeleteWall Mail Organizer
Hey thanks a lot for sharing this. I was excatly looking something like this. I was seaching for articles to buy hanging mail organizer where i came across your post. Very creative! Keep posting similar stuff. Many thanks once again :)
ReplyDeleteEasy and great way to manage your important documents at one place. I loved the idea of the hanging mail organizer presented in this articles. Was searching for something similar to this. thanks for sharing this articles. Keep sharing similar stuff.
ReplyDelete